How to float a hardwood floor
Posted: November 11, 2024Author – Ryan Palma Owner/CEO Sustainable Lumber Co.
Click on these links to view our extensive line of sustainable hardwood flooring, or to contact us for a pricing quote.
What is a Floating Hardwood Floor?
 A floating hardwood floor is a type of installation where the flooring boards are assembled by gluing their tongue and groove edges together. This process allows the floor to “float” above the subfloor without being nailed or glued down. Here is a step-by-step guide on how to float hardwood floors:
Choose the Right Type of Flooring
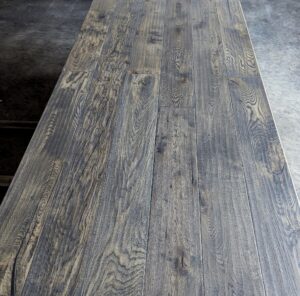
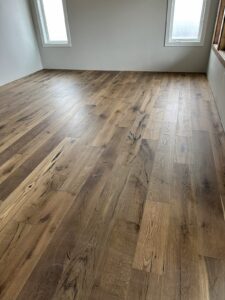
Engineered hardwood, such as our rustic White Oak flooring with tongue and groove on all four sides, is commonly used for floating installations. This flooring type is more dimensionally stable than solid hardwood, making it particularly well-suited for floating floors.
How to Install Floating Engineered Hardwood
Prepare the Subfloor
Clean the Subfloor: Ensure the subfloor is clear of dust, debris, and any nails that might be protruding.
Check for Levelness: The subfloor should be level, within 3/16″ over a 10-foot area. If necessary, use a leveling compound to smooth out uneven areas.
Moisture Barrier: If installing over concrete or in areas prone to moisture, lay down a polyethylene or similar moisture barrier.
Install the Underlayment
Underlayment: Roll out foam, cork, or similar underlayment to provide soundproofing, insulation, and some cushioning for the hardwood floor. Make sure the underlayment is laid smoothly without overlapping seams.
Taping the Underlayment: Secure the seams of the underlayment with tape to prevent shifting.
Start Laying the Hardwood
Expansion Gap: Leave a 1/4″ to 1/2″ expansion gap between the flooring and the walls. This allows for natural expansion and contraction of the wood due to humidity changes.
Layout: Layout several pieces of flooring boards in order to select pieces of varying lengths. You may also visually prefer some boards to others. You can install boards you like less in areas that you know will be covered by furniture or rugs. The boards that are more visually preferred can be placed in high-traffic areas.
Glue the Tongue and Groove
Applying Glue: While the floor will float over the subfloor, the planks themselves need to be glued together. Apply wood glue to the top edge of the tongue before fitting into the groove of the adjacent plank. Be careful not to use too much clue, as it may seep out.
Tongue and Groove Assembly: Begin by laying the first row of planks with the tongue side facing the wall. Insert the next plank by fitting the tongue into the groove of the previous plank. Use a tapping block or rubber mallet to snugly join the planks together, ensuring a tight fit. Wipe away any excess glue immediately with a damp cloth.
Stagger the Joints: As you lay the rows, make sure the end joints are staggered at least 6-8″ away from the adjacent board. This adds strength and stability to the overall floor, and is more visually appealing.
 Continue Laying Rows
Continue gluing and fitting the planks together, row by row. Always stagger the joints and check that the planks are tight and level as you go.
Finishing Touches
Trim the Last Row: You may need to rip the last row of planks to fit. Measure the space and rip the boards accordingly, leaving the expansion gap.
Install Baseboards and Molding: Once all the planks are in place, cover the expansion gap with baseboards or quarter-round molding.
Transitions: Use a transition strip where the hardwood meets other types of flooring, such as carpet or tile.
To Conclude
Floating a tongue and groove hardwood floor provides an easily installed, flexible flooring option that adapts to changes in temperature and humidity without permanent attachment to the subfloor.
Contact Us:
Our knowledgeable and educated staff is here to answer any additional questions you may have. Please call us today for a free quote: Ph# 406.642.7120 or click here to submit an inquiry online. We look forward to working with you on your next project!

